3 Easy DIY Steps To Fix Curb Rash On Your Tesla Wheels
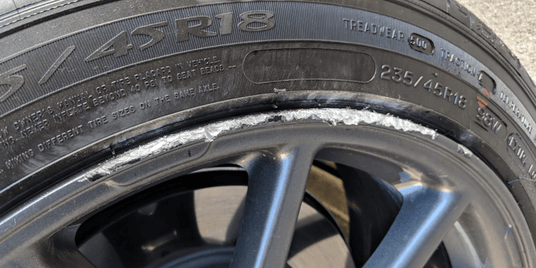
Let's face it...curb rash happens to the best of us.
No matter how great of a driver you are, no matter how advanced your car is, concrete barriers can pulverize your Tesla's wheels.
Fortunately, there are options for making your Tesla wheels look great again.
1. Driving On a Damaged Wheel:
Ignoring the curb rash on your rim may seem like the easiest option, but it becomes an eyesore and it diminishes the sleek, impressive image that Tesla is known for. Every time you drive your car, you're reminded of the mishap.
2. Reduced Resale Value:
Curb rash hurts your Tesla's resale value for most buyers... who will likely notice the damage and ask for a lower sale price. If you trade in your car to Tesla for a newer model, they'll certainly charge you hundreds of dollars for the damage.
3. It Was Someone Else's Tesla:
Damaging someone else's Tesla makes for an extremely awkward and stressful situation. Unless your friend is unusually forgiving, you've lost some of their trust... not to mention the cost of repairing or replacing their destroyed rim.
4. New Tesla Wheels Are Expensive:
A new Tesla wheel costs several hundred dollars, plus you'll need to pay someone to remove the tire and TPMS sensor from the old rim, mount them on the new rim, and rebalance everything before installing it on your car. AND... you'll hate yourself for spending all that money if it happens again.
5. Professional Wheel Repair Problems:
Finding a reliable wheel repair service can be a huge hassle, and it's not cheap. You'll need to search for a service in your area, read their reviews, possibly leave your Tesla with them while they do the repair... then pay them $150-$200.
Options For Dealing With Tesla Rim Curb Rash
When you curb your wheel, you basically have five options:
Want To Fix Your Wheels and Get 10% Off?
Save 10% off the purchase of any Tesla Curb Rash Repair Kit by entering discount code CURBRASH10 at checkout.
Here's the easy DIY 3-step solution to Tesla wheel scrapes:
The do-it-yourself option to repair your curb-rashed Tesla wheel is a great way to save yourself a bunch of money... while getting some quality hands-on time with your car. Once you have everything you need, you should be able to finish the job in less than an hour.
The process described below works great for:
...fixing Tesla Model 3 curb rash.
...fixing Tesla Model Y curb rash.
...fixing Tesla Model S curb rash.
...fixing Tesla Model X curb rash.
Follow these 3 steps if you want to try fixing curb-rashed wheels on your own.
Step 1: Get Ready

Before you start your curb rash repair project, you'll need to take care of a few things.
First and foremost, buy a bottle of wheel touch-up paint that matches the color of your wheels. Tesla wheels come in several different colors, so you'll want to get the right color of paint for your car model and wheel style.
For example, the Tesla Model 3 vehicle has several different stock wheel styles... and each style has a different color. The Tesla Model Y is also available with different wheel styles... and each style has a different color.
Tesla doesn't sell wheel touch-up paint, and they don't publish paint formulas for their wheels.
If you haven't already found the right paint color that matches your wheels, Zink Wheels sells professionally-formulated automotive touch-up paints for every style and color of Tesla Model 3, Model Y, Model S, and Model X wheels:
➡️Tesla rim touch-up paints and repair kits
Next, you'll need some other supplies such as clean cloth rags or towels to clean the wheel before painting, as well as some sandpaper and a sanding block if the curb rash needs to be smoothed-out before painting. You could simply apply the wheel touch-up paint over the damage, but depending upon how deep the grooves are, you may want to remove any sharp / rough edges with a piece of sandpaper before painting.
Finally, for best results, you'll want to have a clean, warm, dry, dust-free work area for painting. You're not doing high-quality body work on a classic show car, so you don't need a professional-quality paint booth... but in order for the paint to stick to the wheel and produce a good-looking result, you should work in a relatively controlled environment. If you can work inside a relatively clean garage instead of working outside, then that is preferred. Warmer temperatures are better than colder ones for painting, and working in a dry, dust-free area is best.
If you have the tools and the know-how to safely remove the wheel from your Tesla, then you may want to consider bringing the wheel indoors to a climate-controlled environment where you can place the wheel on a horizontal surface (floor, table, workbench, etc.) for more comfortable work.
Step 2: Prepare the Damaged Wheel
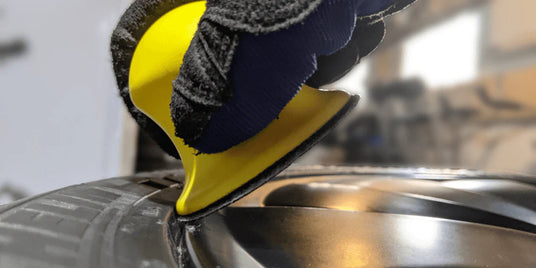
Once you've gathered everything you need and set up your work environment, it's time to prepare the wheel for painting.
If you're fixing curb rash on an 18" Model 3 Aero wheel, an 18" Model 3 Photon wheel, a 19" Model Y silver Gemini wheel, a 19" Model Y Dark Gemini wheel, or a 19" Model S Tempest wheel, then you should remove the plastic wheel cover which is snapped onto the wheel. This will make it easier to work without accidently scratching or getting paint on the plastic wheel cover. When you're done with your repair, you can snap the wheel cover back into place.
If you choose to use sandpaper and a sanding block to smooth the damaged area of the wheel, then carefully do so... but take extra care not to scratch the surrounding area of the wheel with the sandpaper. Usually only the edge of the wheel near the tire is damaged, so you should be able to hold the sandpaper and sanding block at a 45-degree angle to only sand the wheel's edge... without touching the sandpaper to the other flat surfaces of the wheel which can cause scratches.
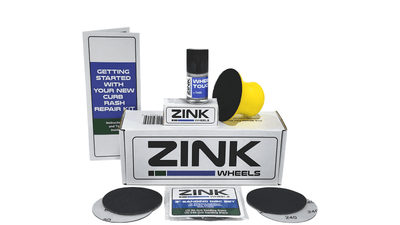
Zink Wheels Curb Rash Repair Kits include everything you need for curb rash repair, such as a sanding block, sanding discs, wheel touch-up paint, and step-by-step instructions. You can check out the Curb Rash Repair Kits available for Tesla Model 3, Model Y, Model S, and Model X vehicles here:
➡️Touch-Up Paints and Repair Kits for Tesla rims
Once you've removed any rough edges from the damaged area of the wheel, clean and dry the damaged wheel area thoroughly in preparation for touch-up paint.
Step 3: Apply Wheel Touch-Up Paint
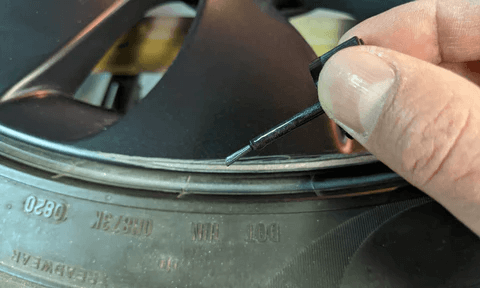
It's finally time to paint! Shake your bottle of Tesla wheel touch-up paint vigorously for 1-2 minutes to thoroughly mix it, then start carefully applying the paint to the damaged area of the wheel.
If your touch-up paint bottle comes with an applicator brush, then use the brush to carefully apply a thin coat of paint to the damaged area. Wait 5-10 minutes for the paint to dry, mix the paint again, and repeat with additional thin coats of paint until the damaged area is fully concealed.
Once the final coat of paint is dry, you're done. You can breathe a sigh of relief and enjoy your beautiful wheels again!
Bonus Tips For Repairing Tesla Wheel Curb Rash
Here are some extra tips for best results when repairing curb-rashed wheels on your Tesla:
🏅Consider Removing the Wheel
If you have the tools and knowledge to safely remove the damaged wheel from the car, then consider bringing it into a climate-controlled space and laying it flat for better results.
🏅Practice First
Before jumping into your wheel repair job, get some practice by applying some paint to a piece of cardboard or a plastic or metal object.
🏅Preparation Is Key
For best results, remove any rough edges of the damaged area with sandpaper or other abrasive tool, then clean the wheel thoroughly. Be careful not to scratch the surrounding area of the wheel.
🏅Some Damage Requires a Pro
Sometimes curb rash damage is too much for touch-up paint to conceal. If your wheel is bent, cracked, or has large chunks of metal missing, contact us for a referral for a local wheel repair professional.
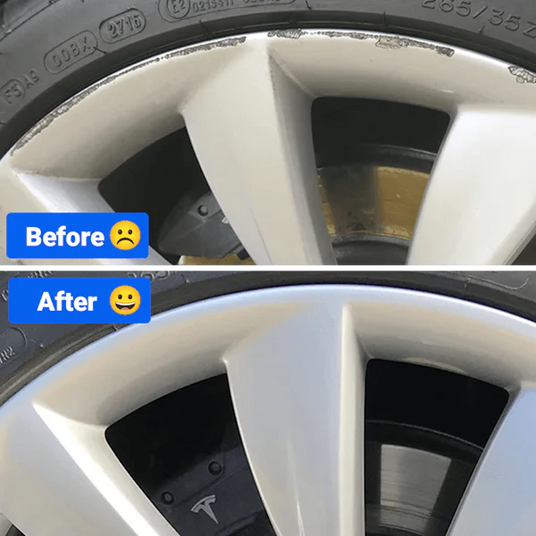
Imagine walking out to your car and those horrible scars on your rims have vanished. Once again you're greeted by a set of four pristine wheels, and you're proud to see your beautiful Tesla again.
You can stop worrying about your Tesla's resale value.
You don't need to spend several hundred dollars on a new wheel replacement.
You don't need to find, hire, schedule, and pay a wheel repair service to fix your wheels for you.
Although it might be a bit easier to buy a new wheel or hire a professional to repair a wheel curb rash on your Tesla Model 3, Model Y, Model S, or Model X... it will cost you a lot more money to follow one of those routes.
If you're willing to spend a bit of time collecting the items you need and don't mind rolling up your sleeves, then you can usually conceal your curb rash and make your wheels look great again in a couple of hours... and save a ton of cash in the process.
Good luck!
Your friend,
-- Tony Zink
